
support@pattrac.info
This lesson describes how to create a Medication Order and Dispense from the order.
Create a New Medication Order
Add a new Medication Order during a patient Encounter
Medication Orders for a patient can be only be added as part of the patient Encounter.
Medication Orders can also be added through the Orders tab in the patient’s Treatment Plan (see lesson “Treatment Plans – Medication Orders“.
NOTE: Medication Orders added using these methods are visible on the Patient screen.
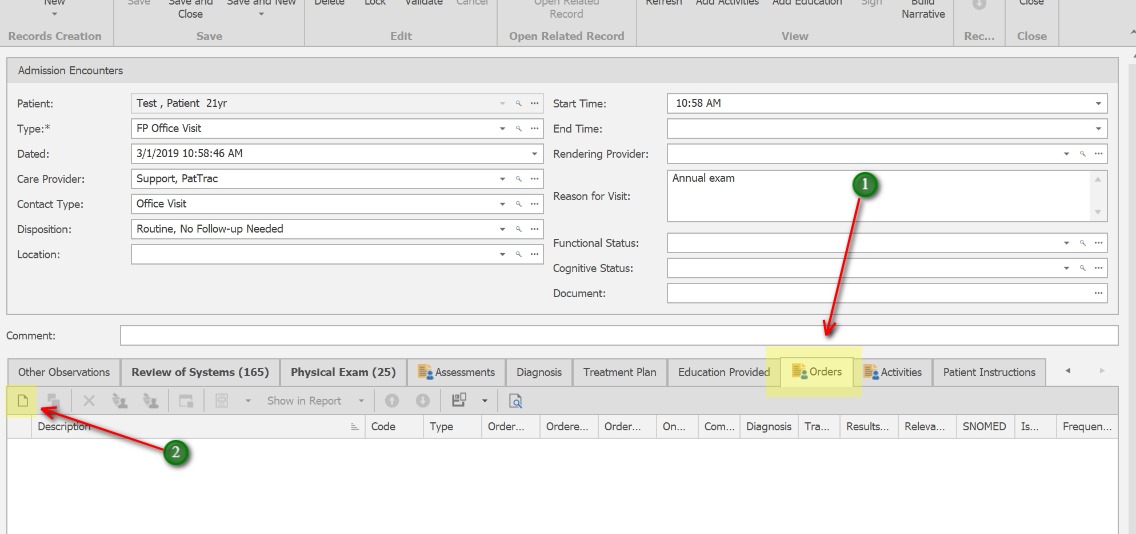
Using the Orders tab in the Encounter:
1. Click the “Orders” tab.
2. Click the “new” icon to add a new Order.
**The “Orders” tab will only be available if designated by the Encounter Type.
Update the Medication Order
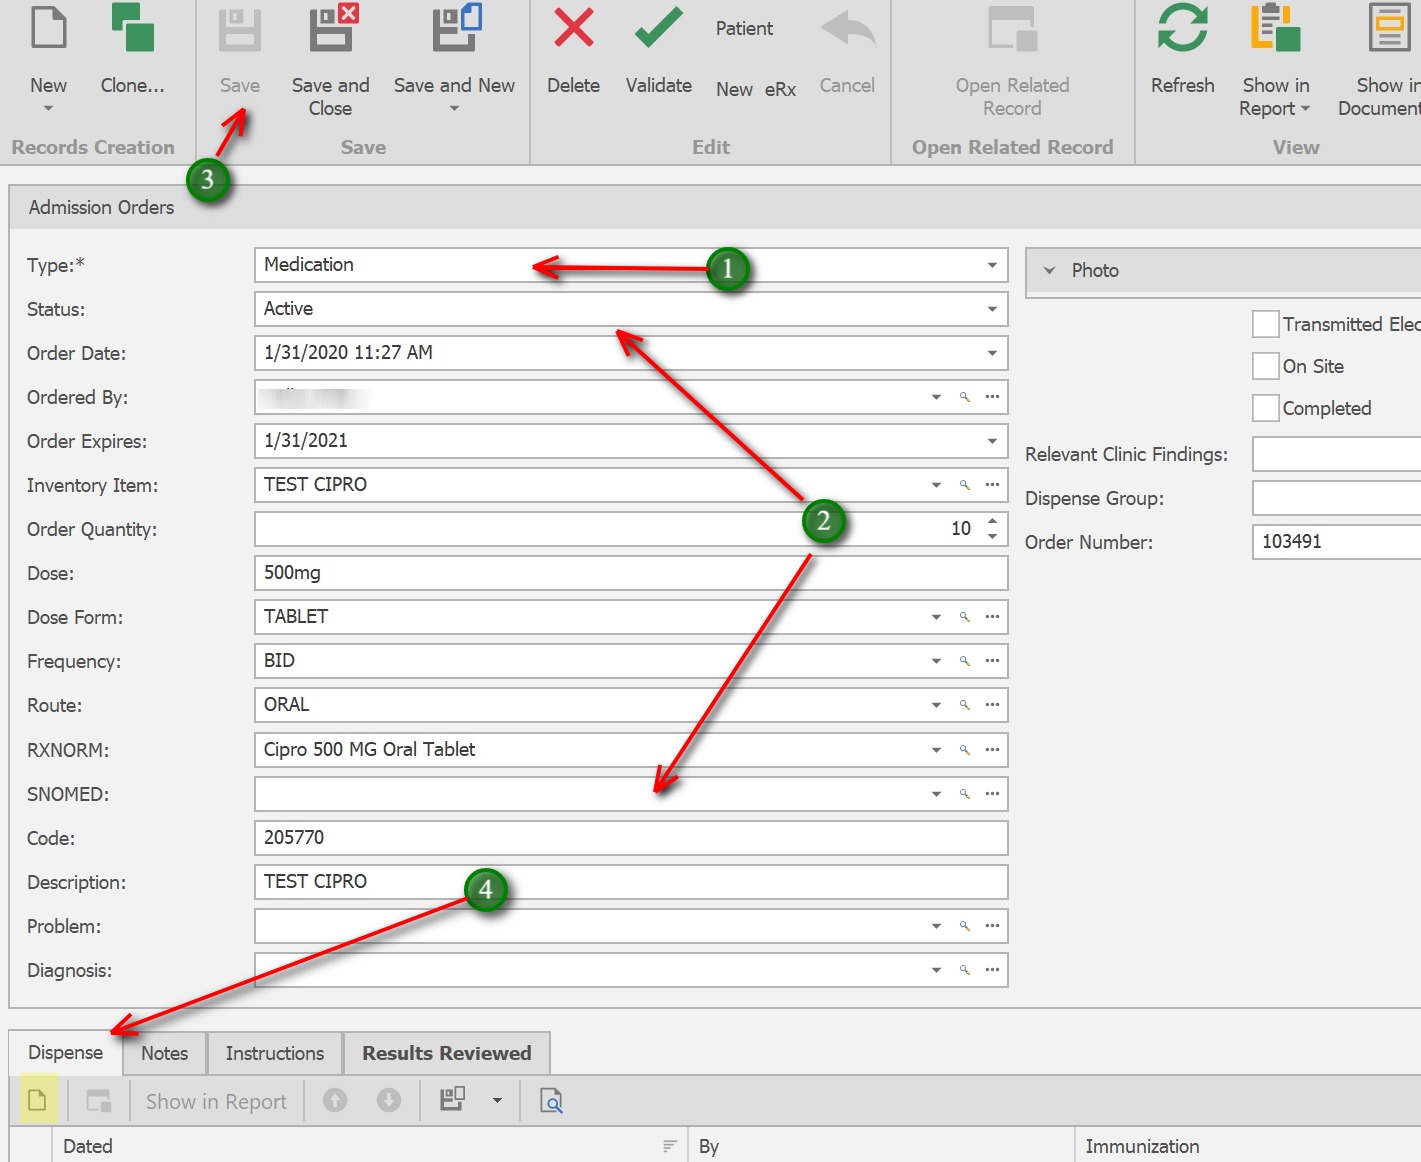
1. Order “Type” will be “Medication” by default.
2. Update all applicable fields:
Status – By default, the order status will be “Active”. Additional status options include “Discontinued”, “Expired”, “On Hold” and “Completed”
Order Date – This will populate automatically with the current date/time.
Ordered By – select the Ordering clinician.
Order Expires – This will populate automatically, one year from the Order Date. Modify as needed.
Inventory Item* – Select the medication from the Inventory.
* Inventory Item selection is needed when dispensing medication. If documenting an Rx, this field is not needed.
Order Quantity – This is amount for total order.
Dose – Use the text field to enter the dose (The specific amount of medicine administered, or taken at one time.)
Dose Form – Use the search to locate the dose form (The physical form of the individual dose.)
Frequency – Use the drop-down to select the Frequency. The number of doses taken within a time period. (This is populated via Field Code MEDICATION.FREQUENCY)
Route – Use the search to locate the path by which the medication is taken into the body.
RxNorm – Use the search to locate the RxNorm. This field will auto-populate IF the Inventory item has an RxNorm description attached to it.
SNOMED – if desired, locate the appropriate SNOMED code.
Code – this will auto-populate if an RxNorm is located.
Description – this will auto-populate if an RxNorm is located.
Problem – This will auto-populate if the Order is added via the Treatment Plan. If desired, select one if not auto-populated.
Diagnosis – If desired, attach a diagnosis code to the order.
Photo – click the triagnle to display the patient’s photo as needed.
Relevant Clinic Findings – If desired, enter any relevant clinical findings to attach to the order.
Dispense Group – If desired select and applicable dispense group
Order Number – A ID number will populate here automatically.
Transmitted Electronically – check to flag orders that have been transmitted electronically (i.e. via eRx or Lab process).
3. Click Save to Save the Order prior to Dispensing.
4. Click the New icon on the Dispense tab to dispense from inventory.
Dispense the Medication
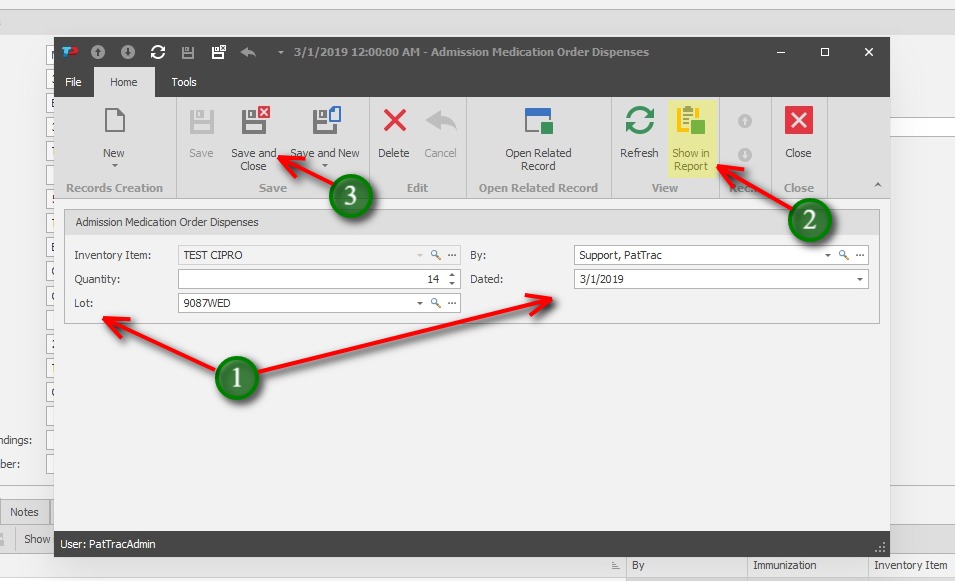
1. Inventory Item – this will populate with the Inventory Item selected in the Medication Order
Quantity – Enter the Quantity to dispense
Lot – Select the Lot to dispense from
By – This will populate with the currently logged in user’s name.
Dated – This will default to the current date/time. Modify as needed.
2. If desired, Use the Show in Report button to print a medication label. (Save the dispense record first)
3. Click Save and Close to exit the dispense screen.