
support@pattrac.info
This lesson describes how to add Medication Orders through the Treatment Plan in a clinical setting.
Treatment Plan Medication Orders
This method allows the user to add patient problems/diagnosis identified during the encounter, and attach orders to each individual problem/diagnosis.
Orders added using this method are visible in the patient’s Admission record AND Patient screen for later review.
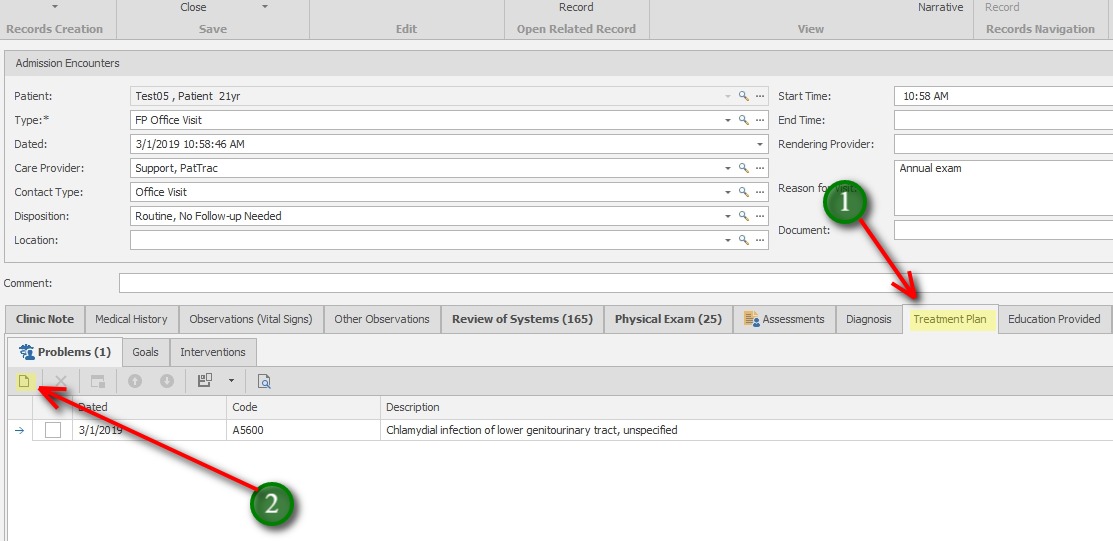
1. In the Encounter screen, Click the Treatment Plan tab.
2. On the Problems tab, click the New icon to add a new Problem
Add the Problem/Diagnosis

1. Update the Problem/Diagnosis details
ICD10 – Use the Search to locate the ICD-10 code
Code – This will populate once the ICD-10 code is selected
Admission – This will default with the current Admission information
Date – This will default with the current date/time
*During the next encounter, if the problem is found to be resolved, then update the Resolved checkbox and Resolved Date (if known)
Description – This will populate once the ICD-10 code is selected
2. On the Orders tab, click the New icon to add an Order associated with the current Problem
Add the Medication Order
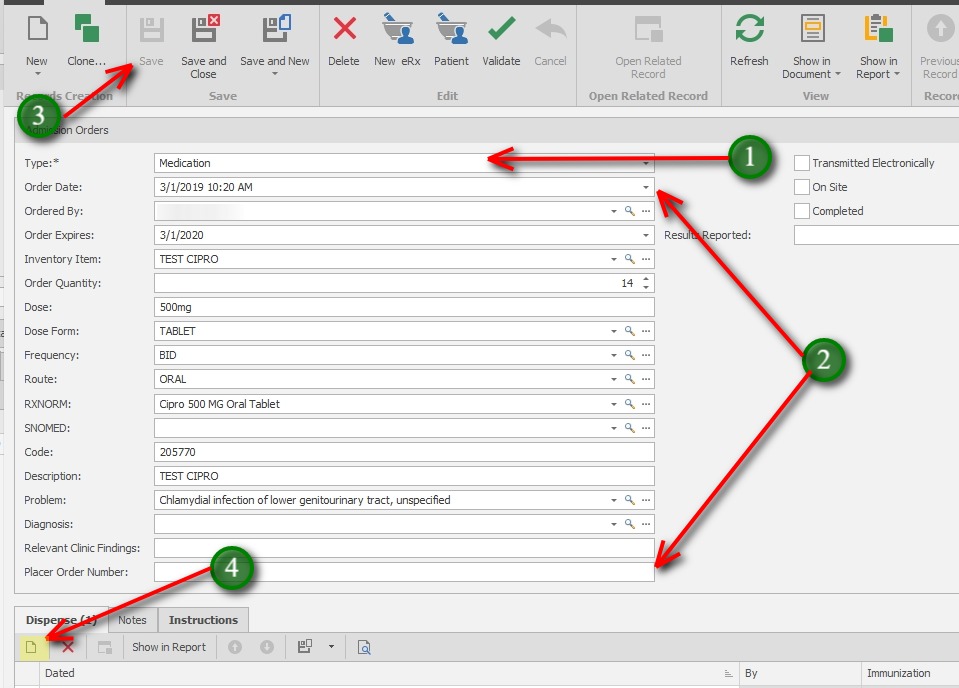
1. Order “Type” will be “Medication” by default.
2. Update all applicable fields:
Order Date – This will populate automatically with the current date/time.
Ordered By – select the Ordering clinician.
Order Expires – This will populate automatically, one year from the Order Date. Modify as needed.
Inventory Item* – Select the medication from the Inventory.
* Inventory Item selection is needed when dispensing medication. If documenting an Rx, this field is not needed.
Order Quantity – This is amount for total order.
Dose – Use the text field to enter the dose (The specific amount of medicine administered, or taken at one time.)
Dose Form – Use the search to locate the dose form (The physical form of the individual dose.)
Frequency – Use the drop-down to select the Frequency. The number of doses taken within a time period. (This is populated via Field Code MEDICATION.FREQUENCY)
Route – Use the search to locate the path by which the medication is taken into the body.
RxNorm – Use the search to locate the RxNorm. This field will auto-populate IF the Inventory item has an RxNorm description attached to it.
SNOMED – if desired, locate the appropriate SNOMED code.
Code – this will auto-populate if an RxNorm is located.
Description – this will auto-populate if an RxNorm is located.
Problem – This will auto-populate if the Order is added via the Treatment Plan. If desired, select one if not auto-populated.
Diagnosis – If desired, attach a diagnosis code to the order.
Relevant Clinic Findings – If desired, enter any relevant clinical findings to attach to the order.
Placer Order Number – if desired, may be used to for barcode scanning.
Transmitted Electronically – check to flag orders that have been transmitted electronically (i.e. via eRx or Lab process).
3. Click Save to Save the Order prior to Dispensing.
4. Click the New icon on the Dispense tab to dispense from inventory.
Dispense From the Medication Order

1. Inventory Item – this will populate with the Inventory Item selected in the Medication Order
Quantity – Enter the Quantity to dispense
Lot – Select the Lot to dispense from
By – This will populate with the currently logged in user’s name.
Dated – This will default to the current date/time. Modify as needed.
2. If desired, Use the Show in Report button to print a medication label. (Save the dispense record first)
3. Click Save and Close to exit the dispense screen.