
support@pattrac.info
This lesson describes how to manually enter and post payer/insurance payments and transactions.
Enter the Payer Payment

Entering payer payments can be split into two steps if desired. The first step will be to enter the check, or payment information. The individual transactions can then be entered at the same time or at a different time. For example, if the check needs to be entered for the daily deposit, the check and receipt can be recorded one day, and the transactions entered the next day.
1. Navigate to the Billing module, then click Payer Payments. This screen will list any previous payer payment records.
2. Click the New button to create a new Payer Payment record.
3. Payer: Select the Payer/Insurance Company
(When entering manually, leave 835 Remittance File field blank)
Dated: This will default to the current date, change as needed.
Type: This will default to Payer Payment
Amount: Enter the check amount here
Payment Type: Select the type of payment
Reference No: Enter the check/referference number here
Note: If needed, enter a note here
Receipt No: PatTrac 2.0 will automatically generate a receipt number after the record is saved.
4. Click Save to save the Payment information
Enter the Payment transactions
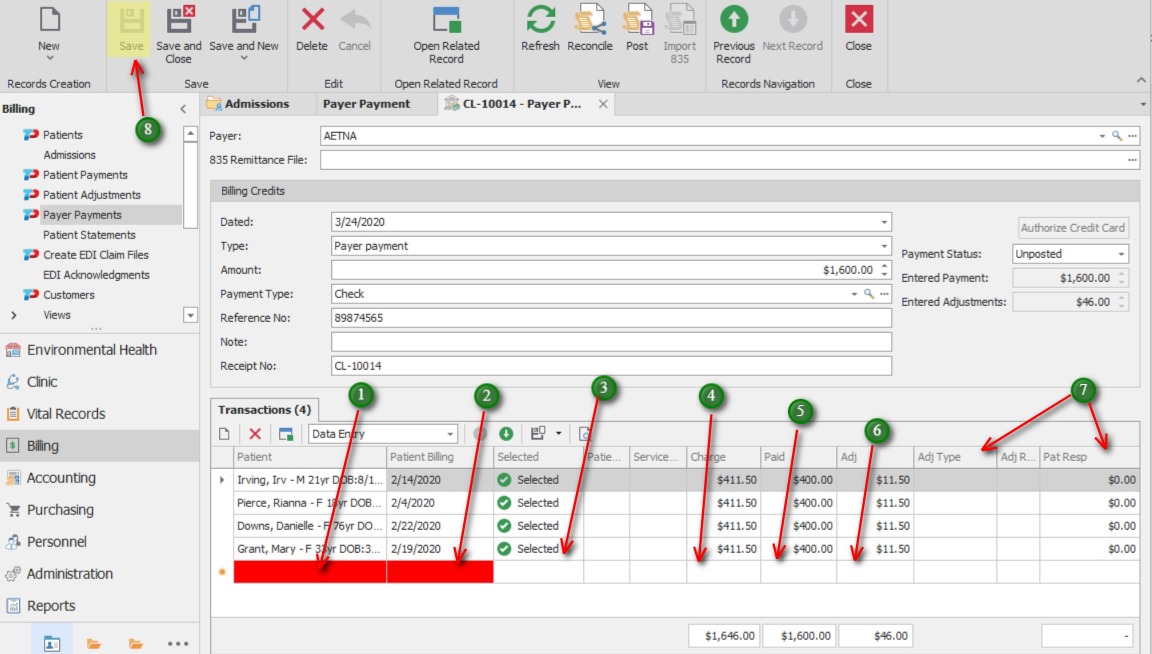
Payment transactions can easily be entered directly into the data cells, similar to entering data into a spreadsheet. Use the tab, or arrow key to move into the next cell.
Some cells may be left blank as they may be utilized when importing an 835 file. Required fields for manual data entry are noted here:
1. Patient: Use the search to find the patient
2. Patient Billing: Select the DOS
3. Choose “Selected” in order to post the transaction to the patient’s ledger. The transaction can also be set to “Excluded” to post at a later time.
4. Charge: Enter the service charge
5. Paid: The amount paid by the payer
6. Adj: The amount adjusted by the payer
7. Enter Adjustment type, Adjustment Reason and Pat Responsibility as needed.
8. After all transactions have been entered, click Save to save all payment transactions.
Post the Payment transactions
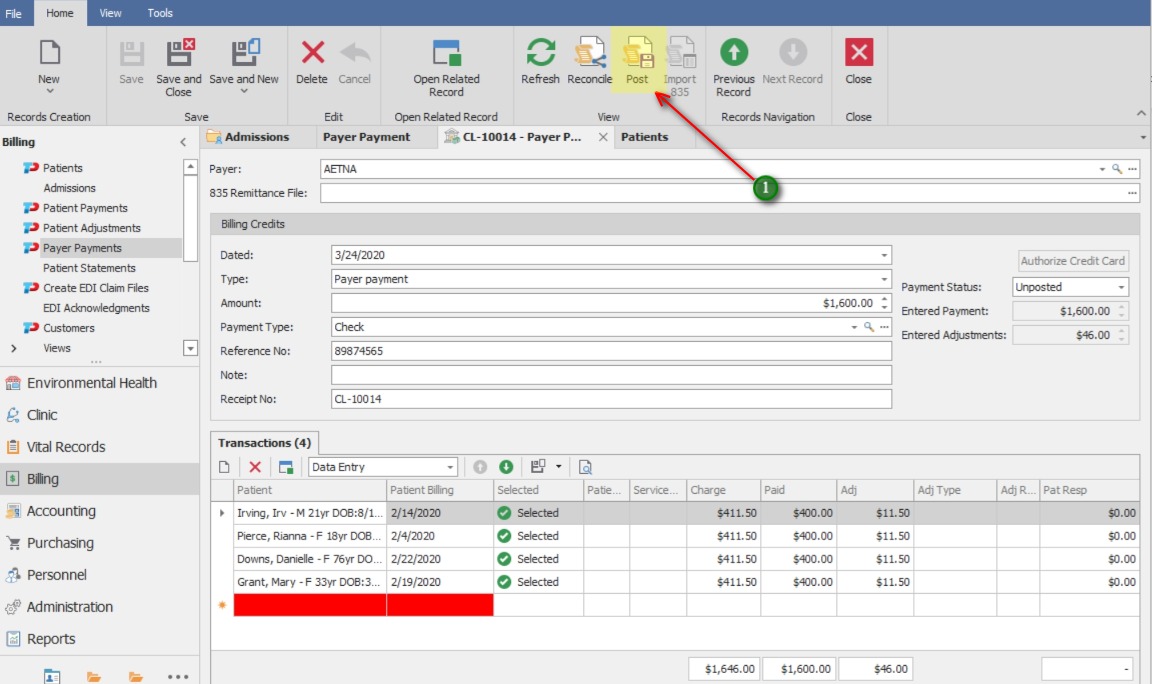
1. After payment transactions have been entered and saved, click the Post button to post payments to patients’ ledgers.
**Note: Transactions that are set to “Excluded” will not be posted to the patient’s ledger.
* The Reconcile button is used only when posting an imported 835 Remittance file
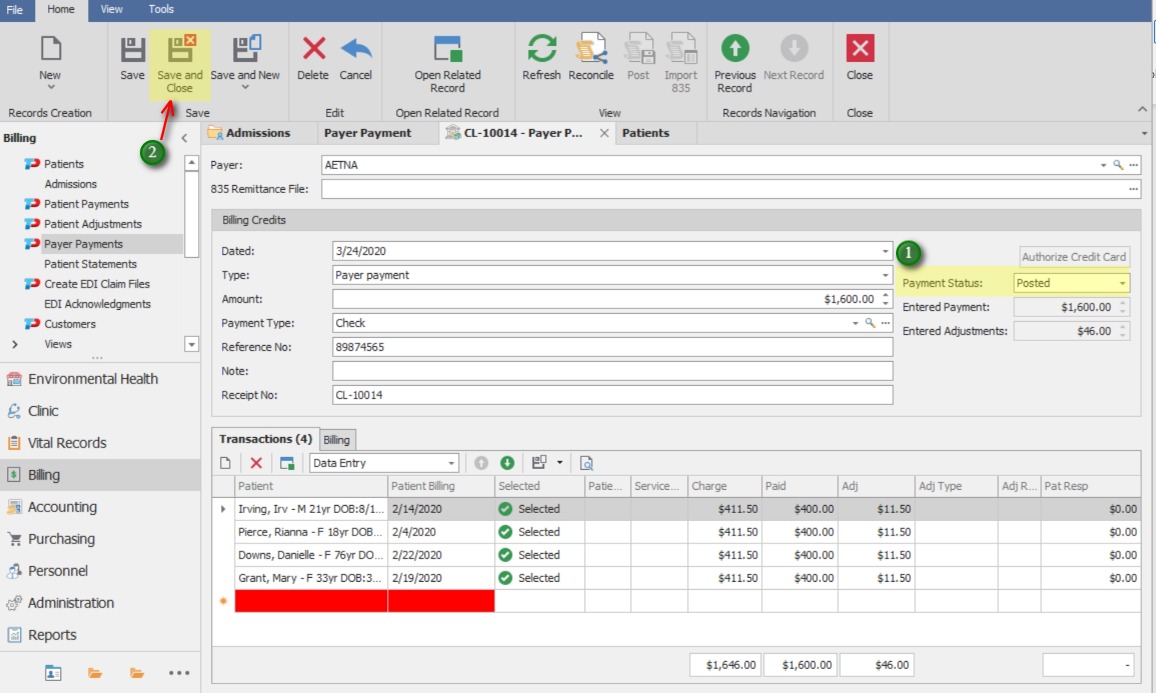
1. Once posted, the Payment status will automatically update to “Posted”
2. Save and Close to exit the Payer Payment screen.
*Transactions will not display on the patients’ ledgers until the Save button is clicked AFTER clicking the Post button.
Patient Ledger
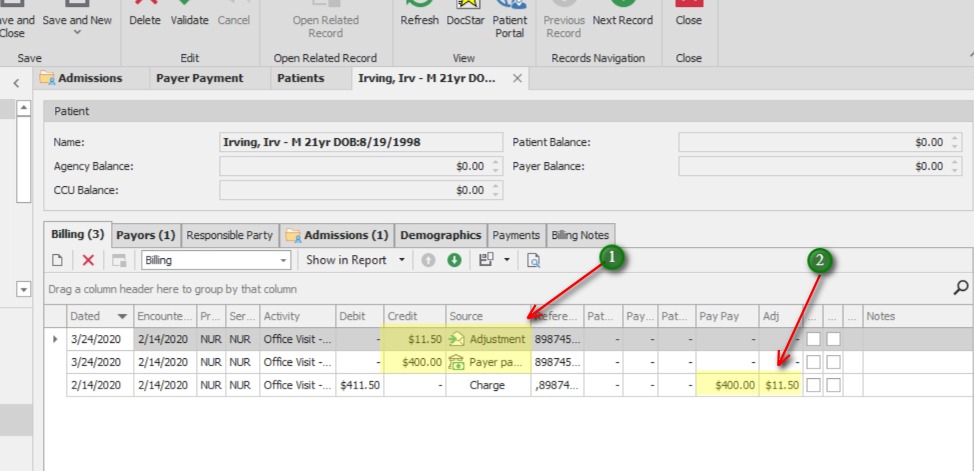
1. The posted transactions will appear on the ledger with the check date with a Source of “Payer Payment”. Adjustments will have a separate transaction line with a source of “Adjustment”
2. The Payer Payment and Adjustment will also appear on the original charge transaction.