
support@pattrac.info
This lesson describes how to add Lab Orders through the Treatment Plan in a clinical setting.
Treatment Plan Lab Orders
This method allows the user to add patient problems/diagnosis identified during the encounter, and attach orders to each individual problem/diagnosis.
Orders added using this method are visible in the patient’s Admission record AND Patient screen for later review.
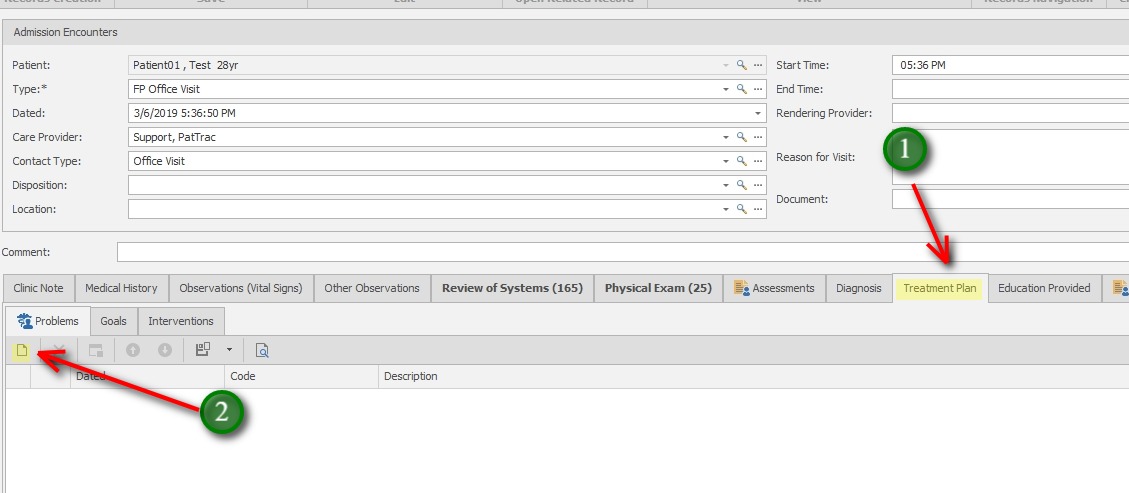
1. In the Encounter screen, Click the Treatment Plan tab.
2. On the Problems tab, click the New icon to add a new Problem
Add the Problem/Diagnosis
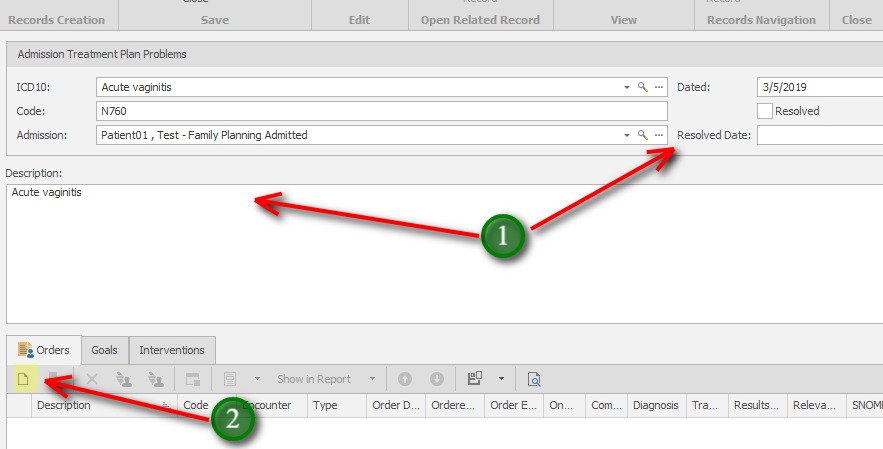
1. Update the Problem/Diagnosis details
ICD10 – Use the Search to locate the ICD-10 code
Code – This will populate once the ICD-10 code is selected
Admission – This will default with the current Admission information
Date – This will default with the current date/time
*During the next encounter, if the problem is found to be resolved, then update the Resolved checkbox and Resolved Date (if known)
Description – This will populate once the ICD-10 code is selected
2. On the Orders tab, click the New icon to add an Order associated with the current Problem
Update the Lab Order